'전체 글'에 해당되는 글 5건

  1. 2018.09.08 spring boot jsp 404 및 tiles 3 연동시 오류 처리 방법
  2. 2018.08.14 안드로이드 APP + fiddler HTTPS 패킷 스니핑
  3. 2018.08.07 Nginx의 사용자 지정 포트(비표준 포트)에서 HTTP에서 HTTP로 강제 리디렉션

spring boot jsp 404 및 tiles 3 연동시 오류 처리 방법

|


intellij에서 실행시 오류날 경우


<dependency>
<groupId>org.apache.tomcat.embed</groupId>
<artifactId>tomcat-embed-jasper</artifactId>
<!--<scope>provided</scope>-->
<scope>compile</scope>
</dependency>


가 중요한듯


참조 :


jsp설정 : https://arturk9.wordpress.com/2017/02/22/springboot-how-to-enable-jsp-in-intellij/


https://intellij-support.jetbrains.com/hc/en-us/community/posts/115000088004-Project-with-SpringBoot-and-TilesConfigurer-


'스프링 > 인텔리J' 카테고리의 다른 글

hotswap 설정  (0) 2018.05.29
And

안드로이드 APP + fiddler HTTPS 패킷 스니핑

|


출처 : http://docs.telerik.com/fiddler/Configure-Fiddler/Tasks/ConfigureForAndroid#configure-fiddler


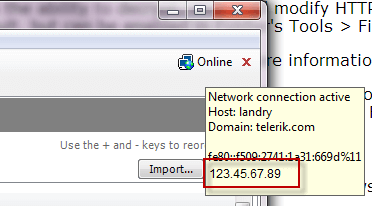
Configure Fiddler for Android / Google Nexus 7

Configure Fiddler

  1. Click Tools > Fiddler Options > Connections.

  2. Ensure that the checkbox by Allow remote computers to connect is checked.

  3. If you check the box, restart Fiddler.

  4. Hover over the Online indicator at the far right of the Fiddler toolbar to display the IP address of the Fiddler server.

    Online Tooltip

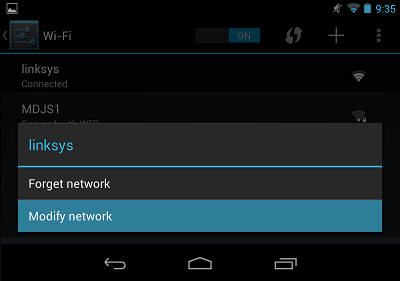
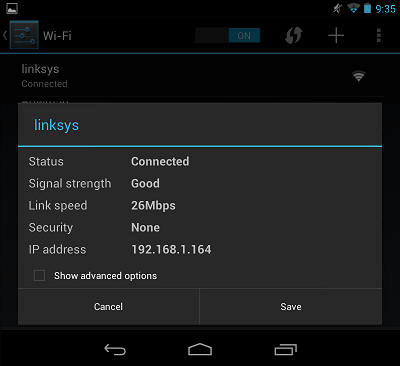
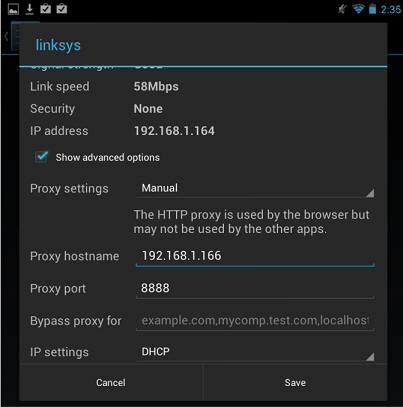
Configure Nexus Device

  1. Swipe down from the top of the screen and tap the Settings icon.

  2. Tap Wi-Fi.

  3. Tap and hold your current Wi-Fi network. Select Modify Network.

    Modify Network

  4. Tap the Show advanced options box.

    Show advanced options

  5. Tap the Proxy settings dropdown and select Manual.

    Proxy settings

  6. Type the IP address and port (usually 8888) of the Fiddler server.

    IP Address

  7. Tap Save.

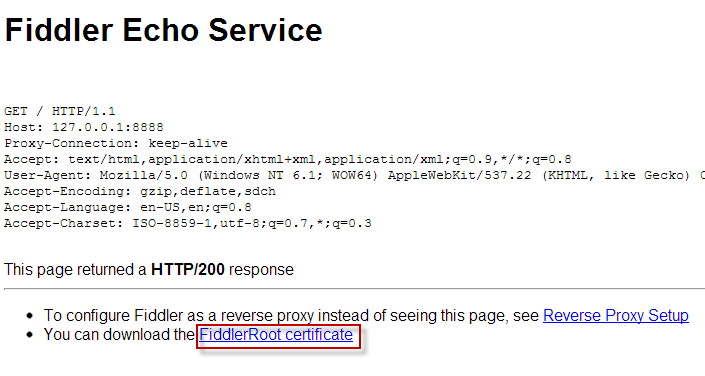
To verify this configuration, go to http://ipv4.fiddler:8888/. Chrome should display the Fiddler Echo Service webpage, and the traffic should appear in Fiddler.

폰에서 접속해서 인증서를 저장한다.

Disable the proxy

After using Fiddler, return to the Proxy Settings screen above and remove the proxy.

Decrypt HTTPS

  1. On the Fiddler Echo Service Webpage, click the FiddlerRoot Certificate link.

    Download FiddlerRoot Certificate

  2. If the download doesn't open automatically, swipe down from the top and tap the Settings icon.

  3. Tap Personal > Security.

  4. Under Credential Storage, tap Install from storage.

    Install from storage

  5. Tap the FiddlerRoot.cer file.

  6. (Optional) Type a name for the certificate.

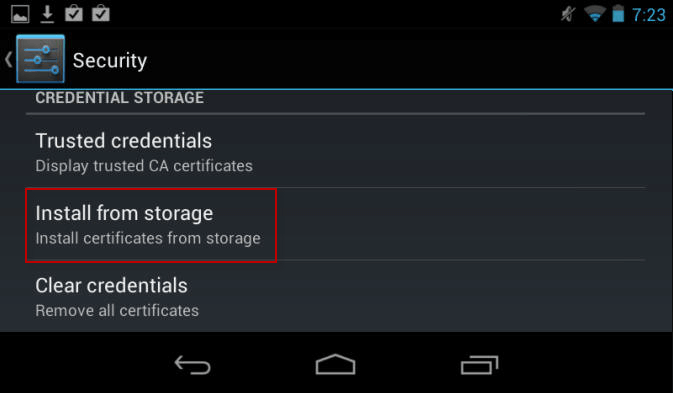
To verify this configuration, tap Trusted credentials > User. This should display the Fiddler certificate.

Disable HTTPS Decryption

To delete the FiddlerRoot certificate, tap Trusted credentials > User and delete the certificate.


And

Nginx의 사용자 지정 포트(비표준 포트)에서 HTTP에서 HTTP로 강제 리디렉션

|


HTTP (표준 포트) 에서 HTTPS(표준 포트) 리다이렉션

server {
    listen       80;
    server_name  aaa.bbb.ccom;
 
 
    return 301 https://$server_name$request_uri;
}
 
 server {
    listen       443;
    server_name  aaa.bbb.ccom;
    ssl on;
 
    ssl_certificate      ssl/combined.pem;
    ssl_certificate_key  ssl/key.pem;
    ssl_session_timeout  10m;
    ssl_protocols  TLSv1 TLSv1.1 TLSv1.2;
    ssl_ciphers  HIGH:!aNULL:!MD5;
    ssl_prefer_server_ciphers   on;


참조 : https://ma.ttias.be/force-redirect-http-https-custom-port-nginx/

HTTP (비표준 포트) 에서 HTTPS(비표준 포트) 리다이렉션

server {
      listen      8888;
      server_name aaa.bbb.com;
      7777 forward and redirect to https
      rewrite ^ https://$server_name:1234$request_uri? permanent;
}


Nginx의 사용자 지정 포트에서 HTTP에서 HTTP로 강제 리디렉션


비표준 포트로 SSL 사용시  Nginx 가상 호스트를 실행하는 경우 HTTP가없는 사이트를 탐색하면 다음 Nginx 오류가 발생합니다.

400 Bad Request
The plain HTTP request was sent to HTTPS port
nginx


예를 들어 비표준 포트 (SSL을 사용하는 1234)에서 실행되는 이와 같은 가상 호스트는 해당 오류를 발생시킵니다.

server {
  listen      1234 ssl;
  server_name your_site;
  ssl         on;
  ...
}


고전적인 방법의 HTTP를 HTTP로 리디렉션

HTTP를 HTTPS로 리다이렉션하는 고전적인 방법은 하나의 가상 호스트가 포트 80에서 수신하고 하나의 443에서 수신되도록하고 포트 80이 모든 트래픽을 HTTPS 으로 리디렉션하도록하는 것입니다.


server {
  listen      80;
  server_name your.site.tld;
   
  301 = permanent redirect, 302 = temporary redirect
  return 301  https://your.site.tld$request_uri;
}
 
server {
  listen      443 ssl;
  server_name your.site.tld;
  ssl         on;
  ...
}


그러나 사용자 지정 포트에서 HTTP / SSL을 실행하는 경우에는 "안전하지 않은"포트가 없으므로이 트릭을 사용할 수 없습니다. 리디렉션 요청을 수신 할 수있는 포트가 없습니다.

비표준 포트에서 HTTPs 리디렉션 강제 수행

Nginx는 사용자 지정 HTTP 상태 코드 를 작성하여 497 이라는 HTTP 버전을 사용하여 HTTP를 통해 가상 호스트를 탐색하는 모든 사용자를 강제로 리디렉션 할 수있게합니다 . 

이는 사용자 정의 포트에서 SSL을 실행하는 경우에만 필요합니다. 그렇지 않으면 위에 표시된 구성을 리디렉션에 사용할 수 있기 때문입니다.

브라우저에서 HTTP에서 HTTPs 포트로 리디렉션하도록하려면 다음을 수행하십시오.


server {
  listen      1234 ssl;
  server_name your.site.tld;
  ssl         on;
  ...
  error_page  497 https://$host:1234$request_uri;
  ...
}


이제 HTTP 프로토콜을 통해 사이트에 도달하는 모든 사용자는 HTTPs 버전으로 리디렉션됩니다.


And
prev | 1 | 2 | next